1) Depending on the status of the room you are scraping you may need to cover walls, cabinetry, floors etc. with plastic drop cloths. I started in the master closet as a trial area and only covered the floor. It's was a little time consuming to cover the carpet, particularly since we knew we were going to be tearing it out soon but it made cleaning up much easier (Shop-Vacs don't really like too much wet drywall) and it made the carpet easier and neater to haul out when we were ready.
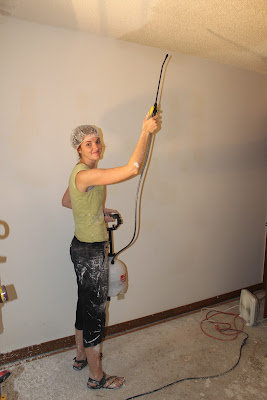
2) After some trial and error I found that getting the popcorn really wet helped it come off much easier. I put warm water in a garden pump sprayer and used that to spray small sections of the ceiling at a time.
 |
| Super cute pic of using the pump sprayer |
3) Most sites recommend using a wide drywall trowel for scraping. I ended up using a smaller trowel because I had better control over it and was better able to avoid nicking the drywall.
4) If the popcorn was putting up too much resistance I just wetted it more.
5) Once the drywall has dried and all the popcorn is down it is time to sand. Again, I tried to use a pole sander and I did not have good enough control so I used a ladder and a palm sander with a medium grit drywall sandpaper. Go through and sand any areas that are uneven or where part of the popcorn has stuck. This is usually the longest and most physically exhausting step. It gets better from here, I promise!
6) Go back with lightweight drywall joint compound and fill in or smooth out any divots or uneven areas. The length of this step will depend entirely on what condition your drywall was in underneath the popcorn. The whole premise behind popcorn ceilings is to hide flaws in the drywall so this can be a long job. I got very lucky and the ceilings were already in pretty great shape once I scraped them. Make sure to look for the nail holes that were originally used to hang the drywall. They are often filled but uneven and will show through the paint. Make sure to spackle them as well.
7) Sand all your new repairs and any other blemishes that you missed the first time around.
8) Repeat. I take the ladder around the room one more time and spackle any other areas I see that are still not smooth. This step is usually pretty quick. Once that spackle is dry go back and sand it again.
 |
| Ceiling scraped & Sanded Once |
Once you are happy with the ceiling it is time to prep it for paint, but that is another post!

No comments:
Post a Comment